Outside View

Outside View
The Exterior View of New Orleans Townhouse

Thursday, May 31, 2012

Scratch Build Store Awning


This is my rough sketch.
 I wanted to create an awning that could be removable by mounting to the architectural trim 

I started with a wooden oval and traced the outline to make a template.
then I traced it onto the wood and made two cut outs 
I cut a round dowel to match the length of the awning
I used a square dowel to brace the front and glued all the parts
 and dry fitted to the front of the store
I cut soft balsa wood dowels and stacked them on top of each
other to follow the contour of the sides
fully assembled awning
I used this scallop trim and cut it to the length of the front edge
I then glued and painted the trim
I took a foam sheet to cover the ends
and then I covered the front 
and trimmed the excess on the sides
 I will cover the edges with trim later
and the top back 
 
I used bead lace to trim and finish the edges

I made this smaller one and added wooden dowels and a strip of wood glued over the door or you could use holding wax.


Painted Brick Exterior of the Bakery and Coffee Shop


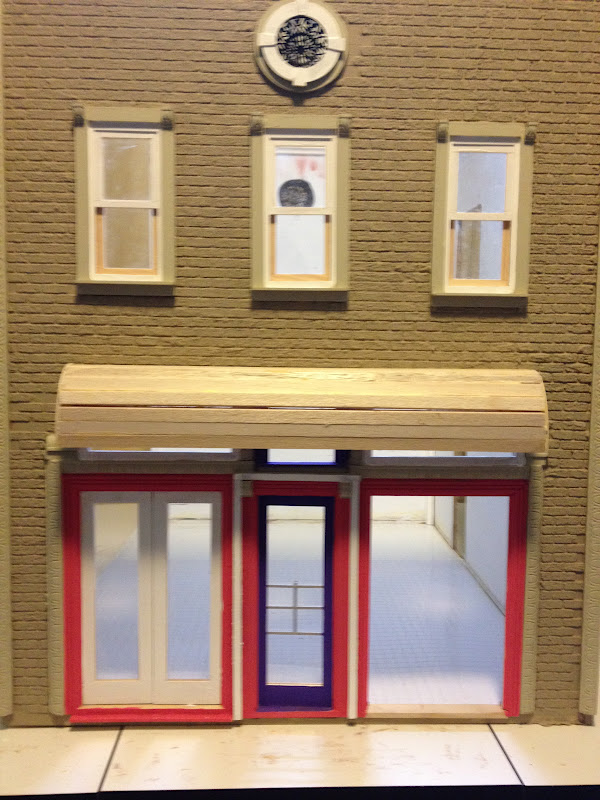
Well, when mini life gives you lemons.... paint the bricks! I had to use an alternative to the brick compound sold by Bromley because they are in the process of reformulating their mixture. So I used sanded grout which is not  exactly like the Bromley but for the most part it worked. It was hard for "me" to get the right consistency and I should have used a bigger spatula to spread the grout, which made my bricks uneven. I sprayed the brick with a sealer. Over time some bricks few off and the dust stained the side walk and everything else it touched. So my solution was to paint the brick with acrylic paint in a neutral color. It helped to seal the grout better and stopped the dust. After I got over the disappointment, I felt it made the older building look more like a modern remodel and gave it a cleaner look.

Monday, May 28, 2012

Scratch Build Wall Mounted Sign with Bracket

I got an idea of how to make a sign with a mounting bracket and just used things I already had leftover from other projects. Wooden square dowels, "woodies" from the bar stools and street lamps, wooden oval from the coffee bar sign, screw eyelets and paint. I put it altogether and created a bracket mounted sign :)

Screw eyelets and a hand drill
I used the hand drill to start the hole
then I screwed the eyelets into the wood
I used the same oval from the coffee bar sign but this was meant to be a table top originally,  so I had glued three ovals together to create added thickness and painted the edges silver, but I could have just used one. 
These rings were too big and thin for the weight of this sign

I painted the bracket black and the sign white. I will add my logo later.
I used 4 screw eyelets and 2 jump rings to attach the sign to the post


Sunday, May 27, 2012

New Wooden Exterior Shop Sign Wall Mounted

The bricks were still wet.

I am going to cut the bottom off the extra "E"


There was only 1 "F" so I had to use an "E"


Here is my painted sign with the modified "E"


I am thinking about changing my bar from alcoholic beverages to coffee, thus the name Coffee Bar. While in my favorite store, Michaels (or at least the closest to my house) I found this wooden cup and thought it would make a good sign. Yesterday I saw these metal scrap letters on clearance. I already had the wooden oval. I painted everything and put it all together and here is what it looks like. 

Saturday, May 26, 2012

Another Picture Frame Idea

I don't know why I hadn't see this before, so simple. You can take the ring off and the picture sides into the side of the frame. @
Michaels