Outside View

Outside View
The Exterior View of New Orleans Townhouse

Thursday, June 30, 2011

Updated Master Suite


I really struggled with this room. I wanted to turn the attic into a master bedroom but I wanted a second bathroom. So I decided to divide the room and make a bathroom, problem- how to make a removable wall with a floor. Because it was the attic, I wanted to allow light into the bath and let you see into the room. I wanted something more modern in design but not too cold. Sooooo, this is what I came up with and it has been a learning experience, this one space! It's like almost everything I have learned from building this house was used in the attic. If you remember, all the electricity is wired on top of the house to save the finished back of the house. Problem- the top is the floor of the attic, as result the flooring needed to be removable. It turned out better I thought but the attic is very dark when the house is lit than the other rooms even with the table lamp. I bought a ceiling light to go in the area above the doors but it is not installed, the only thing left undone in the room. (Hint DAD) The only thing :)


Ceiling light to go over the doors mounted to the back wall


Mom's Seamstress Touch


My loving mom made these for me (before I just wrapped fabric around the bed) and the accessories. I knew that she would after she had discovered what I had done:). I and my dolls really thank her. Mom is still sewing for my dolls after all these years! You can see the before pictures of the furniture in earlier posts. I know you are wondering about that second bedroom set, W-A-I-T for it.
P.S.
Happy Birthday "Ced" and Maud!


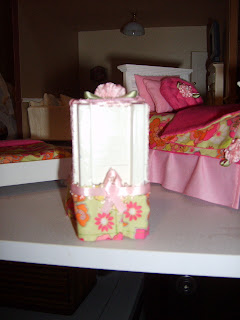
Notice the ribbon on the back


This cover is reversible!

She made the decorative pillows too.


Monday, June 27, 2011

It's the Little Things

I just love these small touches.
I put this on the right side of the house to go with the flower garden.


These are on the left side of the house leading to the back door.

Friday, June 24, 2011

Early Pictures of the Exterior

I realized today that there is only one picture of the outside of the house on my blog. In the beginning I was not taking pictures until I started doing the roof, when my husband suggested that I document all the work I was putting into the dollhouse. I really hate now that I did not take pictures earlier in the build.
I wanted to do the outside in brick. I thought it would be unusual because you do not see many dollhouses in brick; I know why....it is a lot of WORK. I came across this website and they made these brick stencils to use on the exterior of the dollhouse. I used four stencils for the bricks: tudor brick, herringbone brick, rough stone and slate roof, plus the realistic brick powder you mix with water. You paint the house the mortar color and apply the brick stencil when dry. I did get tired towards the end and I used spray paint on the rough stone finish.  It took me three weeks to finish stenciling the outside, including the half-timbering (wood strips).
This is the roof stencil

This is the rough stone

I masked off the area not to be stenciled

Spreading the brick powder mixture over the stencil

This is a finished side of the roof


Close up of the window

The rear with DHE seal

The back door on the left side


Bay window


Early view with yards


Tuesday, June 21, 2011

Updated Kitchen Pictures

These pictures show the evolution of the kitchen.
Discussing the remodel

Backdoor guests are best, so come in and take a look

Copper accents

I made the sweet potato pie from polymer clay

Real crystal tile back splash

I used a real tile for the new marble floor and real wood for hardwood 

Open eat-in kitchen

The table is set for company

I made the cinnamon roll  

View into the dinning area

Open front and glass door cabinets

 Interior window trim still missing

Ceiling still needs finishing

Removed the wall separating the new pantry/laundry room