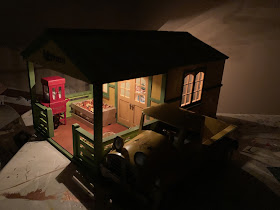
I've had the dolls for 6 years now. I first bought "Mr. Aldworthy" and then I purchased "Phyllis" a year later. When I was finally inspired to give them a home. I didn't want a large store, so I decided to make a farmer's market. The one I made first from a gazebo just didn't seem right to me. So I took a short break from it, which lasted 5 years. I still have a few things I need to finish but I wanted to share my progress before another 5 years get away. I started the building this month and the car in November.
Browsing on miniatures.com. I saw the backyard bungalow kit. It seemed the perfect home for them. I imagine it is an old horse stall on the farm converted to a produce stand and then later enclosed to make it year round market.
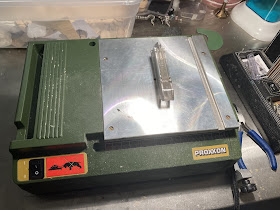
I thought this would be a great "small" project to practice creating a rustic floor for the the farmhouse using jumbo craft sticks. I have a mini circular saw and I used it to cut the 550 craft sticks used for this project's floors, walls and ceilings. My saw stopped working right at the end! Fortunately, I had only a few sticks left to cut by hand.


I used Aleene's Fast Grab Tacky Glue to attach the craft sticks and assemble the kit. I altered the kit by flipping the walls around but I did not realize it until I had glued the kit together. I could tell I was a little "rusty" early in the project.


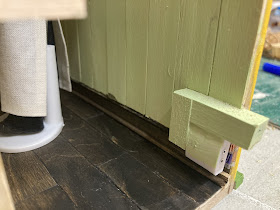
I decided to run tape wire for the lights on the under side of the roof and attached the beams and craft sticks to the assembled roof before attaching it permanently to the house. I later connected the lights that I ran through the center beam to the tape wire. Then soldered a scrap piece of electrical wire down from the ceiling tape wire to a second tape wire on the lower wall which has the junction splice and the transformer lead in wire with the switch. I mounted the junction splice inside the house because I plan to display it on a shelf. I didn't want to distract from the exterior, it would not be that noticeable behind the counter. I covered all the electrical wires with craft sticks.


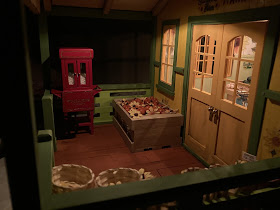
I stained the floor and baseboards with walnut gel stain from Micheals. I tried to give it a "worn" look. I used the sunflower scrapbook paper as a guide for my color scheme. I liked the mix of the painted and the natural wood surfaces. I made the furniture and some of the fruits and vegetables, others I bought over time. I bought the crates and baskets. I ordered the popcorn machine, antique cash register and scale from miniatures.com. I used foam made for slime to slimulate popcorn. The large crate on the porch containing the pumpkins was originally a small basket I got from Michaels. I cut the curved handle off. I bought the mini bales of hay, pumpkins and paper sunflowers during the fall clearance. I still need to make more fruits and vegetables for the empty baskets.


I bought the miniature farmhouse hanging light ready made for the porch and I made the interior lights from small suction cups and miniature round light bulbs I bought from Hobby Lobby. I painted all the shades metallic silver.
The old beat up truck was originally a Christmas candle holder and painted red. It had the support for the candle in the back of the truck. I spray painted it and I removed the post in the bed and used silver corrugated scrapbook paper to cover the hole. I used package plastic for the windshield and black paper to cover the seat. My husband is a graphic designer and helped me design the logo. I printed it on decal paper and applied it to the sides of the truck. I used stickers for the striping on the truck. I also bought sunflower stickers and added them to the truck and the sides of the building for consistency in the "branding".
I used corrugated scrap book paper to make the tin roof. I also used it in the truck bed. I used silver and rusted tin color paint.
Well that's all for now folks!


