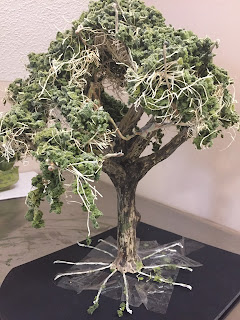
The basic materials I use to make the trees are wire covered in clay or hot glue. These are my first and second trees that I made with two different techniques. There are a lot of wire tree tutorials on YouTube. I am going to supply you with the links to the videos that inspired me the most. My trees are are a combination of watching videos and my own creativity.
*Below I have added things that I did different from the videos*
Making the wire frame trunk:
I used this wire from Lowes because it was cheaper and stronger than jewelry wire. I could make almost 20 large trees for under $10.
I cut 7 pieces of wire to 20". I created a "root" base of 4.5"
I first twisted two pieces of wire together to make the letter "Y"
then added the other pieces of wire to the "Y".
Because the wire I bought was made from 4 strands of wire twisted together,
I just separated the ends of the 7 wires to make separate "branches".
I used a hot glue gun to cover this tree
(this would make nice ice covered tree)
I painted it with acrylic paint in brown and green, then a gray wash afterwards added black lines.
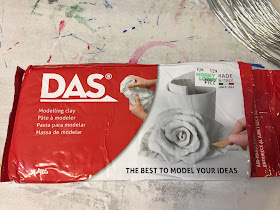
The first tree I just painted with acrylic and the second I covered with DAS clay
Covering the trunk with clay:
I covered the trunk with masking tape but not the smaller branches and I used aluminum foil to bulk up the trunk only. I made spiral rings to cover the large branches, so I would not have to use so much clay. I used the hot glue gun to cover the thin branches for both the hot glue tree and the clay tree and just painted them along with the dry tree trunk. I never used DAS clay before but I found the key is to keep your hands wet. I used a sponge in a bowl with water to keep my hands moist. I also kept the clay damp on the tree with my wet hands to keep it from drying while I worked. I waited a couple of days for the clay to dry on the trunk before painting.
Making the foliage:
I selected large very porous looking sponges with lots of big holes. I had to cut the sponge by hand with scissors because I didn't have a "spare blender" for crafts. It was easier to cut it slightly damp inside a plastic box to contain the pieces, this took a long time. I eventually had to cut both sponges in the pack to cover the tree.
Tip: cut more than you think you will need, one sponge was not enough to cover my trees to get the full look I wanted.
I used two different colors of green mixed with wood glue. I used wax paper to put them on to dry. (To be honest, I couldn't wait, so I added them to the tree while still semi-wet) It is better to let it dry in clumps and before mixing the two greens together.
 |
| I mixed the two shades of green together |
Painting the tree trunk:
These are the colors I used to paint the tree, I use a wet-on-wet and a thin wash techniques. I forgot to take separate pictures of the tree while painting. I just painted in layers beginning with the lightest brown to the darkest accenting the areas that I think would be in the light and shadow. The texture of the lines in the clay helped and I created visual texture with my brush.
Adding the leaves:
I wanted my tree to have a canopy with open spaces like a real tree. On the video they used Poly-Fil stuffing. The material I used is firmer, more durable and offers more support. I don't know what the name of this straw/shredded wood like material is called but I bought it in the floral section. I comes in a bag and is kinda of self-locking, you have to pull it apart to separate. Also because it is a natural material I choose to use this instead of Poly-Fill on the tree.I used Aleene's Tacky Glue and Krylon Easy Tack Reposition Spray Adhesive. When I ran out of the Easy Tack, I used Machine Embroidery Adhesive spray (adhesive for temporarily bonding fabric for sewing and quilting). I used these to help hold the sponge leaves to the tree. I applied the leaves in two stages, this is how it looked after the first application of leaves. I let the leaves dry before adding the second layer.
Tip: paint the straw before putting it on the tree and if you look underneath the tree you can see it. I should have painted it the same color as the sponge pieces for the leaves or trunk. I though the sponge would cover it all up.
First application of leaves:
Final Application of leaves:
On the second covering, the leaves held in place better because they could attach to the dry first layer. I had to do a lot of cutting to trim the tree to reduce the amount of straw that was showing, mainly due to the natural color showing. I actually used my dog's set of grooming scissors with the curved blades. They allowed me to get in the tight spaces better. I painted the places where the straw was showing. I cut some more open space to make the tree look more natural and excess straw from underneath the tree's canopy.
When I was finished sprayed the leaves only with 3M Super 77, to permanently hold everything in place. It took a couple of days for the leaves to dry and the strong smell to go away.


